Free Remote SSH For IoT Devices: Your Ultimate Guide
Ever wondered how to remotely connect your IoT devices over the internet without breaking the bank? In today's interconnected world, the ability to securely access and manage Internet of Things (IoT) devices from anywhere is not just a convenience, but a fundamental necessity. Whether you're a hobbyist with a smart home setup or a developer managing a fleet of industrial sensors, reliable remote access is paramount for efficiency, security, and uninterrupted operation.
This comprehensive guide will demystify the process of establishing a secure remote SSH connection to your IoT devices, focusing on practical, free examples like the ubiquitous Raspberry Pi. We'll explore why remote access matters, dive deep into the Secure Shell (SSH) protocol, and walk you through step-by-step instructions to set up, manage, and troubleshoot your IoT devices remotely. By the end of this article, you'll be equipped with the knowledge and confidence to take full control of your IoT projects, ensuring they run smoothly and securely.
Table of Contents
- Why Remote Access to IoT Devices Matters Today
- Understanding Secure Shell (SSH) in IoT
- Setting Up SSH on Your IoT Device: A Raspberry Pi Example
- Establishing a Secure Remote IoT SSH Connection
- Advanced Remote IoT SSH Techniques and Best Practices
- Troubleshooting Common Remote SSH Issues
- The Future of IoT Device Management with SSH
- Conclusion
Why Remote Access to IoT Devices Matters Today
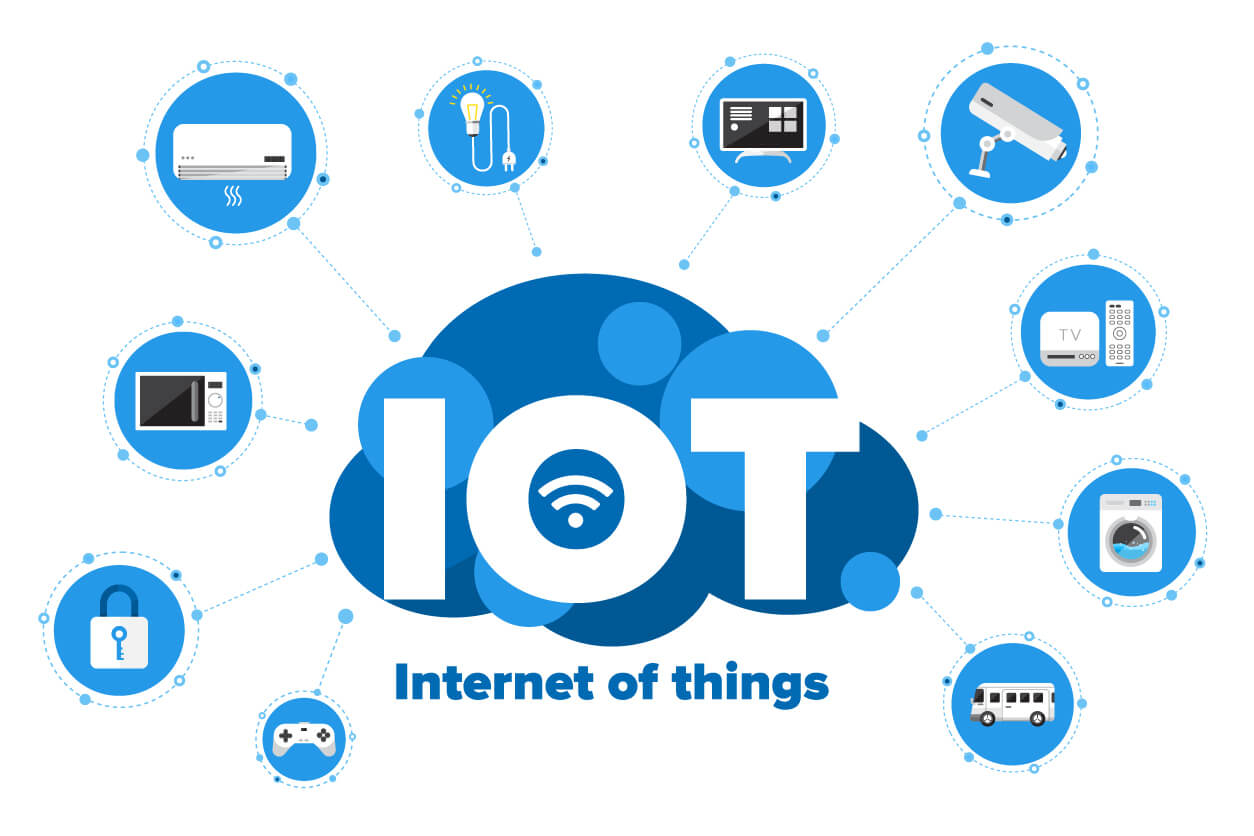
The landscape of the Internet of Things is expanding at an unprecedented rate, with billions of devices now connected globally. This exponential growth brings incredible opportunities but also significant challenges, particularly concerning management and security. Why does remote access to IoT devices matter today? The answer lies in several critical factors that directly impact the efficiency, security, and reliability of any IoT deployment.
- Ginean Rapp
- How Tall Is Golfer Keegan Bradley
- The Fanbus Tv Cast
- Morgan Fille Video
- Kyla Dodds Leaked Video
Firstly, **centralized control** is no longer a luxury but a necessity. Imagine managing hundreds or even thousands of devices spread across different locations. Without remote access, each device would require physical interaction for configuration, monitoring, or updates, a logistical nightmare that is both time-consuming and resource-intensive. Remote access, facilitated by protocols like SSH, allows for a single point of control, enabling administrators to oversee and manage an entire fleet from a central console.
Secondly, **quick troubleshooting** is vital for minimizing downtime. IoT devices, like any technology, can encounter issues—be it software glitches, network problems, or sensor malfunctions. The ability to diagnose and fix these problems remotely means that a technician doesn't need to be dispatched to every site. This significantly reduces response times, allowing for immediate intervention and resolution, thereby cutting down on costly operational interruptions. For example, if a sensor stops reporting data, a quick SSH connection can reveal log files or allow for a service restart, often resolving the issue within minutes.
Thirdly, **firmware updates and software installations** are crucial for maintaining device security and functionality. Vulnerabilities are constantly discovered, and new features are regularly released. Remote SSH provides a secure channel to push these updates and install new software without physical access. This ensures that devices are always running the latest, most secure versions, protecting them from potential threats and enhancing their capabilities. Think of it as a remote maintenance crew available 24/7, ready to keep your devices in top shape.
Finally, **secure data retrieval** is paramount. IoT devices often collect sensitive data, be it environmental readings, operational metrics, or personal information. Accessing this data securely is non-negotiable. SSH encrypts all communication, ensuring that data transferred between your device and your management system remains confidential and protected from eavesdropping. This is where SSH (Secure Shell) becomes invaluable, offering a robust and trusted method for secure communication and remote access in the IoT ecosystem.
Understanding Secure Shell (SSH) in IoT
At its core, SSH, or Secure Shell, is a cryptographic network protocol that enables secure data communication between two networked devices. It provides a secure channel over an unsecured network by using strong encryption to protect the connection. For IoT devices, this means you can securely interact with your hardware, send commands, transfer files, and even tunnel other network services, all without fear of data interception or tampering. Learn about secure shell (SSH) in Internet of Things (IoT) devices and how it ensures secure communication and remote access.
The magic of SSH lies in its ability to establish an encrypted tunnel. When you initiate an SSH connection, the client (your computer) and the server (your IoT device) perform a handshake process. During this process, they exchange keys and agree on encryption algorithms. Once a secure tunnel is established, all subsequent communication—commands, responses, and file transfers—are encrypted. This makes it incredibly difficult for unauthorized parties to snoop on your data or inject malicious commands.
There are two primary methods for authenticating an SSH connection: password-based authentication and key-based authentication. While password authentication is straightforward, it's generally less secure, especially if weak passwords are used. Key-based authentication, involving a pair of cryptographic keys (a public key and a private key), is significantly more secure. The public key resides on your IoT device, and the private key remains on your client machine. During authentication, the client proves it possesses the private key without ever revealing it, making it extremely robust against brute-force attacks.
For IoT deployments, SSH is particularly well-suited due to its lightweight nature and robust security features. Unlike more resource-intensive protocols, SSH can run efficiently on devices with limited processing power and memory, such as a Raspberry Pi or other single-board computers. This makes it an ideal choice for securely monitoring and managing IoT devices remotely, even those operating in constrained environments. The ability to execute commands, update firmware, and troubleshoot issues through SSH makes it an indispensable tool for any IoT developer or enthusiast.
Setting Up SSH on Your IoT Device: A Raspberry Pi Example
One of the most popular and accessible platforms for IoT development is the Raspberry Pi. Its versatility, low cost, and strong community support make it an excellent choice for demonstrating how to set up an IoT device remote SSH example free. This guide will walk you through the process step by step, ensuring you can download and set up SSH for your Raspberry Pi IoT device without any hassle.
Before you begin, ensure you have the following:
- A Raspberry Pi (any model, but newer ones offer better performance).
- A microSD card (at least 8GB, preferably 16GB or more).
- A power supply for your Raspberry Pi.
- A computer to flash the OS onto the SD card.
- Internet access for both your computer and the Raspberry Pi.
The first step is to install a Raspberry Pi OS (formerly Raspbian) onto your microSD card. You can use the Raspberry Pi Imager tool, which simplifies the process. When using the imager, you'll find an option to enable SSH directly during the flashing process. This is the easiest way to get started. Look for the "Advanced options" (usually by pressing Ctrl+Shift+X or clicking the gear icon) and enable SSH, setting a username and password (or better yet, configuring SSH keys directly).
If you've already installed the OS without enabling SSH, you can do so manually. Insert the microSD card into your computer. In the boot partition (the one visible on your computer), create an empty file named `ssh` (no extension). When the Raspberry Pi boots with this file present, SSH will be automatically enabled.
Initial Setup and Network Configuration
Once SSH is enabled, boot your Raspberry Pi. To connect remotely, you'll need its IP address on your local network. There are several ways to find this:
- If you have a monitor connected: Open a terminal on the Raspberry Pi and type `hostname -I`. This will display its IP address.
- Check your router's administration page: Most routers have a section listing connected devices and their IP addresses. Look for a device named "raspberrypi" or similar.
- Use a network scanning tool: Tools like `nmap` (on Linux/macOS) or Angry IP Scanner (on Windows) can scan your network and identify active devices.
Ensure your Raspberry Pi is connected to your network, either via Ethernet or Wi-Fi. If using Wi-Fi, you might need to configure it initially by editing the `wpa_supplicant.conf` file on the boot partition of your SD card before booting the Pi, or by connecting a monitor and keyboard to configure it directly.
Generating SSH Keys for Enhanced Security
While password authentication is an option, it's highly recommended to use SSH key-based authentication for superior security. This eliminates the risk of brute-force attacks against your password and provides a much more secure connection. Here’s how to generate SSH keys on your client machine (Windows, macOS, or Linux) and set them up for your Raspberry Pi:
On your client machine (e.g., your Windows PC, Mac, or Linux desktop):
- Open a terminal or command prompt:
- Linux/macOS: Open your default terminal.
- Windows: Use PowerShell or Windows Subsystem for Linux (WSL). You can also use Git Bash if you have Git installed.
- Generate the key pair: Type `ssh-keygen -t rsa -b 4096 -C "your_email@example.com"`.
- `-t rsa`: Specifies the type of key to create (RSA is common).
- `-b 4096`: Specifies the number of bits in the key (4096 is strong).
- `-C "your_email@example.com"`: Adds a comment to identify the key.
- Copy the public key to your Raspberry Pi: Once the keys are generated, you need to copy the public key (`id_rsa.pub`) to your Raspberry Pi. The easiest way is using `ssh-copy-id`: `ssh-copy-id pi@YOUR_PI_IP_ADDRESS` (replace `YOUR_PI_IP_ADDRESS` with your Pi's actual IP). You'll be prompted for the Pi's password (the one you set during OS setup). After successful execution, your public key will be added to the `~/.ssh/authorized_keys` file on your Raspberry Pi.
- Test the connection: Now, try connecting without a password: `ssh pi@YOUR_PI_IP_ADDRESS`. If you set a passphrase for your key, you'll be prompted for that. If not, you should connect directly.
By following these steps, you've established a highly secure and convenient method for remote access to your Raspberry Pi, laying the groundwork for any IoT device remote SSH example free you wish to implement.
Establishing a Secure Remote IoT SSH Connection
With SSH enabled and, ideally, key-based authentication configured on your Raspberry Pi, you're ready to establish a secure remote IoT SSH connection. This connection is a perfect way to securely monitor and manage IoT devices remotely. Whether you're on a Windows, macOS, or Linux machine, the process is straightforward.
Connecting from Linux or macOS:
Open your terminal and use the `ssh` command:
ssh pi@YOUR_PI_IP_ADDRESSReplace `YOUR_PI_IP_ADDRESS` with the actual IP address of your Raspberry Pi. If this is your first time connecting, you might see a warning about the authenticity of the host. Type `yes` to accept the host key, and it will be added to your `~/.ssh/known_hosts` file. Subsequent connections will not prompt this warning unless the host key changes.
Connecting from Windows:
Windows 10 and 11 have a built-in SSH client, which can be accessed via PowerShell or Command Prompt. The command is the same as for Linux/macOS:
ssh pi@YOUR_PI_IP_ADDRESSAlternatively, you can use a dedicated SSH client like PuTTY. PuTTY is a popular free and open-source terminal emulator that supports SSH. You'll need to download and install it. If you generated SSH keys using `ssh-keygen`, you might need to convert your private key to PuTTY's `.ppk` format using PuTTYgen. Once converted, you can load the key in PuTTY's connection settings under `Connection -> SSH -> Auth` and then connect by entering the Pi's IP address and username (`pi`).
Once connected, you'll see a command prompt for your Raspberry Pi. You can now execute commands as if you were sitting right in front of it. This includes navigating the file system, running scripts, installing software, and checking system status.
Practical Use Cases for Remote SSH in IoT
The power of remote SSH truly shines when applied to real-world IoT scenarios. Here are a few practical examples:
- Data Logging and Retrieval: For example, you can set up a script to log temperature readings from a sensor connected to your Raspberry Pi. With SSH, you can then access these logs remotely, transfer them to a central server for analysis, or even view real-time data directly from the command line. This is invaluable for environmental monitoring, smart agriculture, or industrial process control.
- Remote Control and Automation: Imagine you have an IoT device controlling a smart light or a watering system. Through SSH, you can send commands to trigger actions, adjust settings, or even restart services if they become unresponsive. This allows for dynamic control over your smart environment from anywhere in the world.
- Firmware Updates and Software Management: Manage IoT devices by updating firmware, installing software, or troubleshooting issues through SSH. This is perhaps one of the most critical use cases. When a new security patch is released or a new feature needs to be deployed, SSH allows you to securely push these updates to your devices without needing physical access. This ensures your devices are always up-to-date, secure, and performing optimally.
- Troubleshooting and Diagnostics: When a device isn't behaving as expected, SSH provides a direct window into its operation. You can inspect log files (`tail -f /var/log/syslog`), check running processes (`top` or `htop`), verify network connectivity (`ping` or `ip a`), and even restart services (`sudo systemctl restart my_service`). This capability drastically reduces downtime and the need for on-site visits.
These examples illustrate how a secure remote SSH connection empowers you to maintain complete control and oversight of your IoT devices, enhancing their reliability and extending their utility.
Advanced Remote IoT SSH Techniques and Best Practices
While basic SSH connectivity is powerful, understanding advanced techniques and adhering to best practices can significantly enhance the security, reliability, and functionality of your IoT remote access. By understanding the principles and best practices of SSH, you can establish secure connections that protect your devices from potential threats.
1. Change Default SSH Port: The default SSH port is 22. Attackers often scan for open port 22 to attempt brute-force attacks. Changing your SSH port to a non-standard, high-numbered port (e.g., 2222, 22222) makes your device less visible to automated scans. You can do this by editing the `sshd_config` file on your Raspberry Pi: `sudo nano /etc/ssh/sshd_config`. Find the line `#Port 22`, uncomment it, and change `22` to your desired port. Remember to restart the SSH service (`sudo systemctl restart sshd`) and update any firewall rules.
2. Disable Password Authentication: Once you have successfully set up SSH key-based authentication, disable password authentication entirely. This prevents anyone from trying to guess your password. In `sshd_config`, set `PasswordAuthentication no`. This is a critical security measure.
3. Use a Strong Passphrase for SSH Keys: Even though SSH keys are highly secure, adding a strong passphrase to your private key provides an extra layer of protection. If your private key ever falls into the wrong hands, it cannot be used without the passphrase.
4. Implement Fail2Ban: Fail2Ban is a service that scans log files (e.g., `/var/log/auth.log`) for suspicious activity, such as repeated failed login attempts. If it detects too many failures from a specific IP address, it automatically blocks that IP using firewall rules. This is highly effective against brute-force attacks.
5. Regular Updates: Keep your Raspberry Pi's operating system and all installed software up to date. Run `sudo apt update && sudo apt upgrade` regularly. This ensures you have the latest security patches and bug fixes.
6. SSH Tunnels and Port Forwarding: SSH can be used to create secure tunnels, allowing you to access services on your IoT device that are not directly exposed to the internet. * **Local Port Forwarding:** Access a service on your remote IoT device from your local machine. `ssh -L 8080:localhost:80 pi@YOUR_PI_IP_ADDRESS` would forward port 80 on your Pi to port 8080 on your local machine, allowing you to access a web server running on your Pi via `http://localhost:8080` on your computer. * **Remote Port Forwarding:** Allow a remote machine to access a service on your local machine. Less common for IoT devices, but useful for specific scenarios.
Connecting IoT Devices to a VPC (AWS Example)
For larger, more complex IoT deployments, especially in enterprise environments, securely connecting remote IoT devices to a VPC (Virtual Private Cloud) using Raspberry Pi and AWS involves creating a secure and reliable communication channel between IoT devices, the cloud, and your internal network. This article dives deep into the topic of securely connecting remote IoT VPCs on AWS, troubleshooting common issues, and providing actionable solutions.
While direct SSH from the internet to your Pi is feasible for small projects, it's not ideal for production. A VPC provides an isolated virtual network within the AWS cloud, offering greater security and control. Here's a simplified overview of how SSH can fit into this:
- **AWS IoT Core:** Your devices (like Raspberry Pis) can connect to AWS IoT Core, which acts as a managed broker for device communication.
- **VPN/Direct Connect:** For highly secure and reliable connections, you can establish a VPN tunnel or AWS Direct Connect between your on-premises network (where your management servers might be) and your AWS VPC.
- **Bastion Host/Jump Box:** Within your VPC, deploy a small EC2 instance (a "bastion host") in a public subnet. This instance acts as a secure gateway. You SSH into the bastion host, and from there, you can SSH into your IoT devices (which might be in private subnets or connected via a secure gateway) or other resources within your VPC. This provides a single, hardened entry point.
- **AWS Systems Manager (SSM) Session Manager:** For an even more managed and secure approach, AWS SSM Session Manager allows you to connect to your EC2 instances (including those acting as IoT gateways or even directly to devices running SSM Agent) without opening SSH ports or managing SSH keys. While not strictly "SSH," it provides similar shell access functionality with robust auditing and access control, making it an excellent alternative for cloud-integrated IoT management.
This approach enhances security by minimizing direct internet exposure for your IoT devices and centralizing access control within your cloud environment. It moves beyond a simple IoT device remote SSH example free to a scalable, enterprise-grade solution.
Troubleshooting Common Remote SSH Issues
Even with careful setup, you might encounter issues when trying to establish a remote SSH connection to your IoT device. Here are some common problems and their solutions:
1. Connection Refused: * **Cause:** The SSH server (sshd) is not running on your Raspberry Pi, or a firewall is blocking the connection. * **Solution:** * Ensure SSH is enabled and running on your Pi: `sudo systemctl status ssh` (if it's not running, `sudo systemctl start ssh`). * Check the firewall on your Pi (`sudo ufw status`) and ensure port 22 (or your custom SSH port) is allowed. * Check your router's firewall settings if you're trying to connect from outside your local network (port forwarding might be needed, though often not recommended for security reasons without additional layers). * Verify the IP address of your Raspberry Pi is correct.
2. Permission Denied (publickey, password): * **Cause:** Incorrect username, wrong password, or issues with SSH key permissions/setup. * **Solution:** * Double-check the username (usually `pi` for Raspberry Pi OS). * If using password authentication, ensure the password is correct. * If using SSH keys: * Verify your public key is correctly installed in `~/.ssh/authorized_keys` on the Pi. * Ensure permissions on `~/.ssh` are `700` and `~/.ssh/authorized_keys` are `600` on the Pi. * On your client, ensure your private key file has correct permissions (e.g., `chmod 600 ~/.ssh/id_rsa`). * Ensure you're using the correct private key if you have multiple.
3. Host Key Verification Failed / WARNING: REMOTE HOST IDENTIFICATION HAS CHANGED!: * **Cause:** The host key of your Raspberry Pi has changed (e.g., you reinstalled the OS), or there's a potential man-in-the-middle attack. * **Solution:** * If you know the change is legitimate (e.g., you reinstalled the OS), you need to remove the old host key from your client's `known_hosts` file. The error message will usually tell you which line to remove. You can also remove it with `ssh-keygen -R YOUR_PI_IP_ADDRESS`.
4. Connection Timed Out: * **Cause:** Network connectivity issues, device is offline, or firewall blocking at a deeper level. * **Solution:** * Ping the Raspberry Pi's IP address from your client to check basic network reachability. * Ensure the Raspberry Pi is powered on and connected to the network. * Check any intermediate firewalls (e.g., corporate firewalls, cloud security groups) if connecting from outside your local network.
By systematically checking these points, you can resolve most common SSH connection issues, allowing you to maintain reliable remote access to your IoT devices.
The Future of IoT Device Management with SSH
As IoT deployments become more pervasive and complex, the need for robust, secure, and flexible device management solutions will only grow. SSH, with its inherent security and versatility, is poised to remain a cornerstone of remote IoT device management. Its ability to provide direct, low-level access to devices makes it indispensable for tasks that require granular control, such as debugging at the operating system level or deploying custom scripts.
The evolution of IoT platforms is also integrating SSH more seamlessly. For instance, the remote IoT platform enables developers to connect IoT devices in a web browser as an SSH client. This innovation simplifies access, eliminating the need for local SSH clients and making management more accessible from any web-enabled device. Such browser-based SSH clients often come with additional features like session logging, multi-user collaboration, and centralized access control, further enhancing the management experience.
Furthermore, the principles of SSH—secure authentication, encrypted channels, and remote command execution—are being adopted and adapted in various cloud-native IoT services. While these services might abstract away the raw SSH commands, the underlying security paradigms are often derived from SSH's proven track record. This means that even as IoT management becomes more automated and cloud-centric, the foundational concepts you've learned about SSH will remain highly relevant and valuable.
The future will likely see a blend of traditional SSH access for deep-level diagnostics and automated, platform-driven management for routine tasks. This hybrid approach will offer the best of both worlds: the flexibility and control of direct SSH, combined with the scalability and convenience of managed IoT platforms. For anyone involved in IoT, mastering SSH is not just about current capabilities but also about preparing for the evolving landscape of device management.
Conclusion
In conclusion, remote IoT device SSH example represents a powerful tool for managing and securing IoT devices. We've explored why remote access is crucial in today's IoT landscape, from enabling centralized control and quick troubleshooting to facilitating secure firmware updates and data retrieval. SSH provides the secure, encrypted channel necessary for these operations, making it an invaluable asset for anyone working with connected devices.
By following the steps and best practices outlined in this article, you can successfully implement SSH for your IoT projects and enhance your control over these devices. Whether you're setting up a simple temperature logger on a Raspberry Pi or planning a more complex deployment involving cloud VPCs, the principles of secure SSH connectivity remain consistent. Mastering SSH for remote IoT Raspberry Pi download free Windows (or any other OS) is a valuable skill that can significantly enhance your projects, offering unparalleled

Premium Vector | IOT Internet of things devices and connectivity
What is the Internet of Things and how does it Work?

¿Qué es el Internet de los objetos (IoT)? - Tridens
